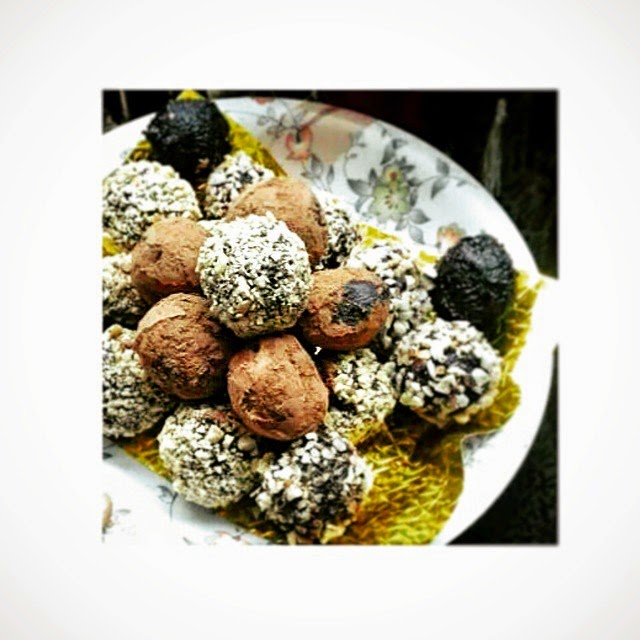
These divine truffles are not exactly the most easy thing to make but they are worth every little stain on the kitchen counter and your clothes! These scrumptious Truffles are the perfect Winter-Time Guilty Pleasure and also great for sharing with friends/family or giving as gifts on the 'special' days!
Once you get a hang of the basic melting, cooling, shaping and coating procedures, the sky's the limit in terms of variations in the basic Ganache mixture as well as the toppings/garnishes that can be used to coat the truffles!
So get a sturdy spatula, lots of patience and you shall be rewarded immensely!
INGREDIENTS:
For Ganache:
Dark/Semi Sweet Chocolate (chopped) - 300 gm (Can NOT use Milk Chocolate/Must use Cooking Chocolate)
Double Cream/Tetra Pak Cream - 200 ml
Unsalted Butter at room temperature (sliced) - 75 gm
Sugar (if using dark chocolate) - 2 tsp
Optional but (definitely) recommended:
Nutella/Peanut Butter/Hazelnut Spread - 5 to 6 tablespoons
For Coating:
Dark/Semi Sweet Chocolate (chopped) - 150 gm
Unsalted Butter - 50 gm
Vanilla Essence - 2 drops
For Garnish/Toppings: (As Needed)
Chopped+Roasted Peanuts or
Chopped+Roasted Almonds or
Cocoa Powder or
Desiccated+Roasted Coconut or
Sprinkles or
Shredded Dark/Semi Sweet Chocolate
METHOD:
First of all, spread old newspapers on the kitchen surface so that you wouldn't have to clean all the mess that will be made during the cooking process. Once you make the truffles, simply roll up the newspapers and discard them.
I would also suggest using a spatula during each stage of the recipe as it helps minimize wastage and wipes every bowl clean easily! Now let's get on with the method:
A. For Ganache and Toppings:
- Chop the chocolate as fine as possible so that it melts easily. Put it a microwave/freeze safe bowl (any glass or good plastic bowl). Add the sugar if using dark chocolate. Also add the sliced butter to the bowl.
- Pour the cream in a pan (preferably nonstick) and heat on a slow flame till the cream starts bubbling.
- Use a spatula to gradually transfer the boiling cream to the bowl with the chopped chocolate. butter and sugar.
- Keep stirring the mixture with the spatula to ensure melting of the chocolate and butter. A shiny mixture should be formed. Add and mix in the Nutella/Peanut Butter/Hazelnut Spend if using.
- If all the chocolate/butter is not melted, microwave the mixture for 30-40 seconds. Continue to stir with spatula until everything is mixed well with no lumps.
- Let the mixture cool for 15 minutes stirring occasionally. Now cover with Cling Wrap and put it in the freezer for 30 minutes. This is your ganache.
- In the meantime, prepare the toppings. Chop any nuts finely and roasted them in an oven using a baking sheet or on a hot, dry pan for a few minutes till they are fragrant and golden. BE CAREFUL or you will burn them.
- Put each topping on a separate plate or bowl to be used during Section C.
- Line a tray or baking sheet with wax paper or a piece of clean newspaper. Take out the Ganache from the freezer. It should have a semi-solid consistency.
- Using a pair of spoons, dollop/drop small lumps of the Ganache on the tray. If the Ganache starts melting, put it back in the freezer for a few minutes. Continue to divide the Ganache into small amounts on the tray using the spoons.
- Put the tray with the lumped portions of Ganache in the refrigerator now for 15-20 minutes so that the Ganache soon-to-be balls are set further.
 (a little visual cue from Google)
B. For Coating:
- Five minutes before taking out the tray, start making the coating for the truffles. Melt the chocolate either directly in a pan on a VERY low flame or use a double broiler (Google this). As soon as the chocolate melts, take it off the hear, add the butter, mix until combined and shiny. Chocolate can burn very easily so be very careful during this stage!
- Add and stir in the Vanilla Essence as well. You can create variations by adding different essences or extracts such Peppermint, Lemon essences etc.
- If the coating is too thick to be used, add a bit of cream or a few drops of milk to loosen it up.
C. Forming the Truffles
- Take out the tray from the fridge. Take each lump of ganache in your hands (use gloves if you want to) and using the palms of your hands, slightly squeeze the lump and shape it into a nice spherical ball. Put it back on the tray.
- Continue rolling each lump of ganache in your palms, till you get a batch of rounded truffles.
- Put these truffles back in the fridge for a few minutes so that they stay firm.
- Now take them out again. Reheat or Microwave the chocolate coating made in section B so that it is fairly runny again.
- Now comes the messy (and extremely fun) part of coating the truffles with the chocolate coating and rolling them in the toppings.
- It is easier to use your hands to do this although they will get covered in chocolate very soon. Take a small amount of the coating in your palm (make sure it is NOT TOO HOT), put each truffle in your palm and roll it with both hands until it is totally covered with the chocolate mixture.
- Now immediately, put the chocolate-coated truffle in the plate or bowl desired of desired topping and roll around till the truffle is covered completely. The molten chocolate on the outside helps the topping to adhere to the truffle.
- Coat, roll and garnish the truffles to your hearts content! Once they are completed, leave them at room temperature for a few minutes (don't put them in the fridge or they'll go soggy) and then quickly put them in an airtight container. These will last a few days if kept dry!
- Make sure you share them with others after you make them. Depending on your speed and experience in the kitchen, these can take quite a lot of time but they are totally worth it!
Please post any comments or suggestions to make the recipe better!
Enjoy!